[tabs slidertype=”left tabs” auto=”no”] [tabcontainer] [tabtext] Video [/tabtext][tabtext] Overview [/tabtext] [tabtext] Making it Work [/tabtext][tabtext] Habit Change [/tabtext][tabtext] Ingredient Handling [/tabtext][tabtext] Food Storage [/tabtext][tabtext] Actions [/tabtext][/tabcontainer][tabcontent] [tab] 
Module 1 Video
Module 1 Audio

(You may need to ‘right click’ and ‘save link as’).
NOTE: The material in the audio and video is covered on the following pages in written form if you prefer to read.
[/tab] [tab]
The Organized Cook, An Overview.
Before we get started I just want to say a huge WELCOME to the Organized Cook. If you’re ready to get more organized in the kitchen then you’re totally in the right place. This program is all about helping you prepare food for the busy week ahead so you can still eat well and be well.
In Module 1 we’re going to get you started and really set you up for success but before we dive into the module 1 content I just wanted to give you a quick overview of the program so you know what’s ahead.
MODULE 1: Getting Started
You’ll discover a secret that chefs use that will give you a head start in getting ahead of your cooking. And the good news is you won’t necessarily have to sacrifice your precious free time and spend the whole weekend locked in the kitchen to make it work
MODULE 2: Prepping Ingredients for Multiple Meals with ‘Building Block’ Recipes
Building block recipes are a key tool to helping you be ready to pull together delicious, healthy meals with minimum effort. Perfect for weeknight dinners. Preparing ingredients like this means you’re prepared without being confined to specific meals. They’re also brilliant because they also generally help to ‘preserve’ your ingredients meaning you’ll be less likely end up with waste!
MODULE 3: Do Ahead Meals
For those days when you just want to come home and have dinner already made. This module is all about arming you with a collection of new ideas to help you get ahead and ‘cook once, eat twice’ or more…
MODULE 4. Meal Planning
For those weeks when you can’t be bothered to ‘think’ about what to cook, this module has you covered! Even though I normally don’t like to be told what to do, every time I use one of my pre-prepared meal plans, I’m surprised just how nice it is to buy the ingredients on the shopping list and then walk into the kitchen each night and just cook from the plan.
MODULE 5. Leftover Love
In this surprise bonus module we’re going to be doing a deep dive on leftovers. This includes 6 tips for Keeping leftovers safe, How to handle leftover ingredients and my favourite ways to use leftovers.
BONUSES
If you haven’t already, make sure you check out the ‘bonues’ page and download your complimentary copy of my ecookbook ‘The Tired & Hungry Cook’s Companion’. And there’s also the Soupstones Pantry eCookbook which is all about setting yourself up with a life saving pantry. I’m a huge believer in having a well stocked pantry to help in the organization department so if you think you could do with some help I highly recommend checking out that bonus.
There will also be some ‘graduation bonuses’ which will be released after module 5 is complete. These include the ebook for the entire class which you will be able to download and keep forever. Your eCookbook includes links to all the videos and audio as well as the written content. There will also be surprise bonuses but we’ll keep them a surprise for now 🙂
[/tab][tab]
The easy way to make ‘mise en place’ work for you.
When it comes to getting results from this program, I have two words for you. Take. Action.
It’s all well and good to watch these videos or read through the content but unless you actually take action you’re not going to see any results.
So now that you’re going to take action the next question is what action to take?
Here’s what I recommend…
1. Make a regular ‘date’ with yourself for some ‘mise en place’.
Think about your schedule and what is going to work best for you. It might be every Sunday afternoon or every Monday evening. Making a regular time in your schedule will help embed this as a new habit.
It doesn’t need to be loads of time either. You could get away with just 15 minutes and still be able to get a few things done. But if you can allow 1/2 hour that would open up a lot more possibilities.
I recommend choosing a time when you would already be in the kitchen if you can. This way you’re not creating extra cleanup work for yourself.
2. Choose 1 thing to make.
Have a look through the recipes section of this module. I’ve started you out slowly with 7 of my favourite ‘mise en place’ recipes that I make on the most regular basis. I’ve kept the list concise for this module on purpose so you don’t get overwhelmed.
In module 2 you’re going to get the full compliment of over 20 different options but I really recommend choosing 1 recipe this week, buying the ingredients and then making it during your ‘date’ with yourself.
3. Use your chosen item during the week.
Check out the ‘usage suggestions’ that come with each building block recipe for ideas.
And that’s it.
[/tab][tab]
How to form life changing habits that will put the whole process on autopilot and set you up for success.
I’m a huge believer in the benefits of developing healthy habits as a way to set yourself up for success. We go into the whole psychology of habit change in great depth in the Healthy Meal Method Program. So if you’d like to really go deep with habit change, I highly recommend checking out that program once you’re done with The Organized Cook.
But since habit formation is so important I thought I’d run through the basics with you now…
1. Choose the habit you want to change.
Since you’re in this class it’s probably being more organized with your shopping and cooking. But try and be more specific than that. The clearer the better.
For example your habit might be that you want to have at least 2 meals per week that you completely ‘do ahead’. Or it might be that you want to get into the habit of preparing at least one ‘mise en place’ or building block ingredient each week.
2. Make a commitment to change.
And make it public! Research shows people who share their commitment with one or more people that they care about are far more likely to succeed with their habit change.
3. Start small.
This is SUPER IMPORTANT. The number 1 reason for failure in starting any new habit is that we ‘bite off more than we can chew’. If we get over excited and over ambitious and you know where that leads… It’s key to remind ourselves to take baby steps. It’s all about progress not perfection.
4. Expect failure.
Even though I consider myself to be pretty organized, there are still times when I buy too much food. Or I just cant be bothered roasting those beets and they end up going bad in the fridge. The thing with failure is that the important thing is to pick ourselves up and keep going rather than getting discouraged and giving up.
5. Keep trying.
One of my favourite words is perseverance. And that’s what it’s all about 🙂
[/tab][tab]
How to best handle fresh ingredients
One of the biggest challenges with healthy cooking is that fresh produce doesn’t stay fresh forever.
You’ve probably had the experience of getting excited about eating healthier and gone out and stocked up on fresh veg and fruit. Only to feel overwhelmed every time you look in the fridge. And a few weeks later, you’re trowing out a heap of veg gone bad with that guilty feeling.
I’ve been there too. And it’s not great.
So we want to make sure you avoid that whole fresh produce trap. Here’s how…
1. Resist the urge to over buy.
Remember when we were talking about habit change and I said how it’s important to start small. I really wasn’t kidding.
So when you’re at the market and you’re feeling excited about your new organized cooking habit. All that great looking veg will be tempting but for now it’s important to take it slow. Only buy what you know you’ll actually cook and eat. It’s all about baby steps. About gradually building your new habit and making sure you don’t go into overwhelm.
2. Refrigerate ASAP.
If you’re not sure where to store something, the best bet it is to pop it in the refrigerator. The rule of thumb to remember is that at lower temperatures everything happens more slowly. This includes the three main causes of food spoilage: microbe growth, dehydration and oxidation.
3. Protect from exposure to the air.
Uncovered food dries out very quickly, especially in the dry air of the refrigerator. And since fresh produce, like humans, is mostly made out of water, the best thing we can do to keep our fresh things fresh is to prevent drying as much as possible.
I keep pretty much all my fruit and veg wrapped in either the plastic bags I purchased them in or I transfer them when I get them home. Having a fridge full of veg in plastic bags doesn’t look as nice as having the crisper overflowing with uncovered veg. But at the end of the week when I can still pull out a head of broccoli that looks just as fresh as when I got it home from the market, I know it’s worth it!
The same goes for protein.
I generally just keep my meat, fish and poultry wrapped in the packaging they were purchased in. With cheese I tend to leave it again in sealed packs. But if I buy a loose piece of parmesan I wrap it in waxed paper or baking paper and then keep in an airtight container or ziplock bag. This way the cheese can breathe but won’t get dried out.
If you follow these three guidelines, you’ll have most things covered.
4. Follow the ‘Waste Avoidance Strategy’.
To make life easier for you and really embed these principles, I’ve included a ‘Waste Avoidance Strategy’ section with each recipe. This gives you detailed instructions for how to best store each ingredient and what to do if your plans change and you aren’t going to be able to cook that meal or building block. You’ll know exactly how to ‘preserve’ your ingredients and avoid needless waste.
However, if you’re interested in learning more about minimizing waste I recommend checking out Module 4 of Master Your Meal Plan.
[/tab][tab]
4 Food storage best practices to help you minimize waste.
In the previous tab we went through the best way to handle fresh ingredients. Now we’re going to focus on storage tips for cooked ingredients and meals. You’ll notice a lot of common ground but I wanted to talk about them separately because there are some subtle differences.
1. Chill asap
Once something is cooked and you know it’s not going to be eaten, the safest thing is to chill it quickly. Food spoilage and disease causing microbes thrive in ‘warm’ food so the less time spent at room temperature and above the better.
I usually leave food on the stove of bench top until it is cool enough to touch and then cover and refrigerate as soon as I can. But if I’m not going to be around, I prefer to put warm food straight into the fridge. Modern refrigerators are designed to cope.
2. Cover
As with fresh produce, uncovered cooked food quickly dries out so it’s important to protect it in the fridge and freezer. I like to keep cooked food in pyrex containers with plastic lids so my food is touching glass not plastic. They’re also great for stacking in the fridge. But covering a bowl with cling wrap will do the job.
Just remember if you cover something hot, you’ll get condensation which generally isn’t a big problem but can make things soggy down the track. And longer term the higher moisture area can make it easier for mould to grow.
3. Freeze ASAP.
If you are planning to freeze something, now is better than later. Unfortunately no one has invented a freezer which magically makes food fresher than when it went into the freezer. So the earlier you freeze, the better your food will be when it gets defrosted.
We’ll be covering the ‘7 Golden Rules of Freezing Food’ and ‘Defrosting 101’ in Module 3 when we focus on ‘Do Ahead’ meals.
4. Follow the ‘Storage Best Practices.
Every recipe comes with details of how to best store and reheat. So if you’re unsure just check out the recipe page and you’ll know exactly what to do.
[/tab][tab]
Your Actions
Basically this is repeating how to make ‘mise en place’ work for you…
1. Make a regular ‘date’ with yourself for some ‘mise en place’.
2. Choose 1 thing to make.
3. Use your chosen item during the week.
4. Share your results in the comments below. [/tab][/tabcontent] [/tabs]
My Top 10 Favourite ‘Building Block’ Recipes
To avoid overwhelming you I’m starting off with my all time favourite building block recipes. Don’t worry there will be plenty more released in module 2 and beyond!
[one_half]


[/one_half][one_half_last]


[/one_half_last]
________


Hi Jules
Doing this course again along with you all.
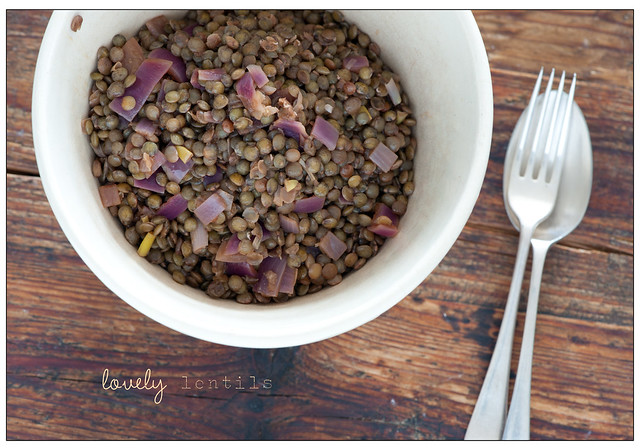
Last time I cooked lots of vanilla fruit and lovely lentils.
I still do and use Lovely lentils. It goes great with tomato paste etc as a faux bolongese.
I’m going to try with the steamed cabbage and make lentil / cabbage lasagna – which I love!
Yum Yum Yum Kate!
Loving the sound of your cabbage & lentil lasagna!
Looking at the recipes for module one has inspired me. I love steamed cabbage with butter. And I love the idea of the magic sausage and cabbage. That gives me an excuse to figure out how to make the mustard sauce I get at one of my favorite brewpubs (my server there gave me a list of ingredients). Yum!!! Your original magic sausage supper is one of my favorite regular meals to fix.
Glad you’re inspired Susan!
I’d love the recipe / ingredients list for your mustard sauce. Sounds amazing!
Jx
Hi Jules,
The mustard sauce ingredients are: #1 mustard seed, salt, turmeric, paprika, spice, garlic powder. That is copied directly from the list the server gave me. The only other thing I can tell you is that the sauce is about the same consistency as mustard from a jar.
I also need to say that I tried batch prepping caramelized onions, and even using a lid on the pan and the exhaust fan, my house smelled so strongly of onions all day that I would be happy to never have caramelized onions again. I’m usually okay with making them, so my reaction was totally unexpected. Maybe I need to make only enough of them to use in recipes that call for small amounts of them, as opposed to the 5 onions I cooked yesterday…
The mustard sauce sounds lovely Susan! I’d probably play around with adding turmeric, paprika and garlic powder to a dijon mustard and taking it from there. Curious what the mystery ‘spice’ is!
Maybe roasting onions would be better for you if you want to minimize smell – they can be quite pungent! Or possibly trying it with red onions since they tend to be sweeter and milder. Or cook them outside!
Jx
Today’s plan is roasted apples with vanilla. Also, chicken stock which used to be one of my old favorites when I used to cook. I see broccoli mushroom soup in my future! maybe also soup with potatoes and onions. And I love having cooked chicken for my other meals.
I’m glad to be started again! My family was impressed with my keeping food from going to waste.
Which reminds me, how does arugula work as a green to salute?
saute. Auto correct is messing with me.
You know I’ve never tried sauteed arugula on its own Denise… have added it in with other greens and didn’t really taste it… Will have to experiment!
JX
Hi,
I am going to start with roasted veg and roasted fruit, using what I already have at home.
Broccoli, mushrooms, potatoes, and apples. Maybe also carrots. I am working from home for a few days, so this will be easy to fit in. Can you roast onions to caramelize them?
Sounds like a great plan Denise! Yes roast onions are lovely but can be tricky to get them caramelised without burning around the edges… you’ll need to stir them quite a bit
The broccoli, mushrooms and potatoes were excellent. As a bonus potatoes cooked and then refrigerated are better for you – more resistant starch, I think.
I left the onions in the peel and haven’t checked them yet. But I made a discovery. I cut a bad part off one of the onion and put it cut side down on the sheet. When I checked after 20 minutes the skin slipped right off. I have peeling onions. I might try caramelizing them sometime by starting them in the oven until I can get the peels off and then using a saucepan.
Oops. I meant to say I hate peeling onions.
Yes you’re right about resistant starch in cooked and cooled spuds Denise. More good fiber for gut health and lower GI. I cook spuds like that all the time. And aren’t roast onions the best?!
JX
Hi Jules, there are some great ideas here! The whole roast veg link doesn’t work, though. Thought you might want to know.
Thanks Natalie!
Link is fixed now 🙂
I’ve saved of your building block recipes. I knew I would never make the chilli oil so I didn’t save that. When I clicked on the roast veg I got 404ed. Bad link.
Thx Virginia… Will get the link fixed!
Should be working now Chris! Jx
I made grated carrots as the ready-to-eat veg, and roasted some whole potatoes, sweet potato, beetroot, carrots and chopped cauliflower. I have already used the grated carrots in a quick salad to accompany my dinner tonight, and added some of the roast veg to a stew I made and portioned out for lunches this week.
When I did the whole roast veg, the skins peeled off easily from all the veg except the carrots. Do you normally peel your carrots before roasting them? It didn’t taste very pleasant!
Wow Niki! You’ve done heaps!
I don’t peel carrots at all and always just eat the skins… But if you don’t like the flavour of them I guess peeling before will help in that case 🙂
Thanks, I’ll give the roasted carrots another go. Happy to say that my grated carrots have lasted happily for a week and we’re just finishing them off tonight. My roasted veg all got used up with dinners during the week. I also did a batch of brown rice, this came in really handy one night when I had to fit in cooking dinner and going for a run in between finishing up work and going to a school concert. I steamed a piece of salmon and an individual bag of veges from the freezer (yes, thank you Jules for helping me not feel guilty about cheating sometimes) and served these with some warmed up brown rice – super easy and quick dinner!!
I now get a recipe box each week and had worried about how to make the fresh veg last all week, so this lesson will really help with that! I didn’t know that you could blanch fresh veg to keep it longer and it makes the recipe go much more quickly in the week.
One thing about the lesson, it says Freeze ASAP. Good advice, but just wanted to emphasize that anything hot should be *thoroughly* chilled before putting into the freezer. Otherwise, you risk partially defrosting other already-frozen items which can cause problems further down the road.
Yes to warm things going into the fridge, although it does use more energy, it will definitely help prevent spoilage, especially in summer. But I would put freshly cooked stuff in the fridge overnight before attempting to put into the freezer. Anything cooked going into the freezer should already be cold from the fridge.
Cheers, Michelle G [An American in Derbyshire UK]
Great Michelle! And thanks for sharing your concern about freezing too soon. I always cool to room temp and then freeze. No need to refrigerate first, unless you have a really old freezer it’s going to take a lot more energy to defrost the already frozen food than adding something that’s already down to room temp.
Jx
Starting the week with the right foot: I did the Lentils for lunch today.
I simply cooked the lentils with the ingredients I had at home, and to serve I put the lentils over a plate fool of lettuce and other greens.
I thought it wouldn’t be enough for me and my husband, but it was a delicious lunch and both of us felt satisfied.
Now I have a lot of leftovers for the week, probably I’ll freeze a portion.
Lesson of the day: We don’t need to eat a lot to feel satisfied!
Thanks for sharing your lesson Marina.. This is great! And lentils are brilliant for keeping you feeling full as well 🙂
Hi Jules.
This is great. Am now really looking forward to the course and happy I signed up do it. I’m going to make some lovely lentils and vanilla pears – I know you said one but there are pears to be used up (I get a semi regular vege or vege fruit box delivered – one of the reasons your course appeals)
Also can you help – I get an error message when I click on bonuses. I assumed this was because I bought TOC only but given what you said in the video I don’t think so. I’m clearly logged in properly as I’ve just watched the video!
I have this same problem with the Bonuses!
Sorry Marina! You should be able to see them now!
Caroline
Thx for letting me know Marina! Should be all
Fixed now. Sorry!
Thanks so much for checking about the error message Kate! Sometimes it’s hard to test everything so it’s super helpful if you let Caroline and I know if there’s a problem 🙂
I decided to try the ready-to-eat veg. I started with cauliflower and had such fun that I also shredded broccoli stems and carrots. Now I’ve been putting them in everything: salads, scrambled eggs, even hummus. The only problem is that I think I made too much. But they really are ready-to-eat, so I eat more of them. Loved the cauli-rice with my chicken and broccoli stir fry tonight. What a fabulous idea!
Yay Meg! This is one of my secret weapons for eating more veg! Just be careful with making too much broccoli because it goes slimy after a few days.. I’ve been caught before 😉
Jx
If you make too much, you could turn it into soup and then it would keep longer, right?
Absolutely Denise.. any cooking reduces your bacterial populations right down so your extending the shelf life
While I like the look of the lentils and the greens, I fell in love with the roast fruit as soon as I saw it. I was surprised to realize I have NEVER eaten roasted fruit — and I love fruit-based desserts. I’m also trying to wean myself off processed sugar.
I see myself serving this warm with a bit of coconut milk or cream, doing up a crumble, throwing them on yogurt for breakfast…and possibly attempting the dessert wine variation for date night.
I think I will do this with peaches.
I love the roast peaches Katrina! We’re in pear and apple season here which is nice but I’m dreaming of Summer peaches 🙂
Jx
Hi jules…catching up on class. Roast veg on my list today.
Quick question…is it possible to roast sweet peppers and store long term, how?
We’re heading into autumn so thinking on how to store seasonal bounty … Lots of things to practice roasting on 😉
Absolutely Hannah!
I’d chop them to remove the seeds just to make it easier to store them. Then once roasted pack into ‘sterilized’ jars (just hot and clean from the dishwasher) cover with extra virgin olive oil and keep in the fridge for months.
Glad you’re getting into roasting!
Jx
I did a few mise en place items this week and it was fab! I made a batch of quinoa to eat for various meals. I roasted some veggies – didn’t do the slow whole root veg but roasted pumpkin pieces, broccoli pieces, carrots and served in a warm quinoa salad and also used as pizza toppings on Friday night. And today I got a big veg box for the week and it had loads of greens so I have blanched them all. Certainly takes up a lot less space and they look so lovely and vibrant once blanched! Am thinking of investing in a few more glass containers for storing it all in the fridge too.
Would you slow roast a whole butternut pumpkin in the oven, Jules?
Wonderful Angela!
Thanks for sharing. And yes I do roast whole butternut… it’s the basis for my no chop butternut soup https://stonesoupvirtualcookeryschool.com/2014/03/no-chop-butternut-soup/
It’s so much easier cooking butternut this way 🙂
I wouldn’t have thought to try broccoli in the oven… will give it a go!
Jx
Hi Jules and all of you,
The roast fruit looks yummy!
And the “Ready-to-Eat-Veg-Injection” is tempting, too.
But I have potatoes already at home which are begging for attention. So “Whole Roast Veg” will be my baby step for this week.
Wonderful Smittens!
Roast spuds are always popular around here 🙂
I’m on a very tight budget, so will be making recipes from what I mostly have. This week I commit to the greens with kale, spinach, and chard ( love my summer garden) Also, the lentils, and quinoa.
Although I’m starting a little late, due to vacation, here I am, living in Alberta Canada.
Welcome Barb!
Lucky you having access to a summer garden… I’m very jealous 🙂
Hope you had a lovely vacation.
And if you’re on a really tight budget, lentils are definitely your friend.
After you’re finished with ‘The Organized Cook’, you might find the ‘Mastering the Art of Cooking on a Budget’ program worth a look
Jx
Vanilla Roast Fruit and Ready-To-Eat Veg – pictures
Hummus – pesto
I can’t open!!!
Thank you Jules for this class. I’m totally inspired but must keep in mind that I need to take baby steps rather than trying to do it all and becoming less than enthusiastic.
I have some spinach and kale in my fridge now so will be preparing it as per your suggestions.
Wonderful Sue!
Yes baby steps really are the key…
Jx
Hiya Jules and friends – I’m so pleased to have found this resource. I’m getting great results using my rice cooker to cook quinoa. A real no-brainer cooking method!
Hi Robyn!
I hadn’t thought about a rice cooker for other grains… thanks for sharing
Jx
I opened Module 1 Friday night, and jumped up to roast some cherries that I had bought because they’re in season, but had no specific plan for. Can I jump to Module 5 now? That will help enormously in straightening out my fridge, in addition to condiment reduction.
Nice one Susan!
How did the cherries turn out?
Jx
Apart from the lack of almond extract, terrific! I can’t eat a lot of summer fruit raw because of allergies, so I’m happy to have a simple way to make them edible. The really important thing is that I jumped up to do it. I didn’t overthink it. I still have some onions I’ve been planning to caramelize from an earlier course. I’d probably better check on them.
Great Susan!
Yes taking action is really the key. Good for you 🙂
wow i’m overwhelmed because i never give a thought to bake fruit
like i bake the roots and pumpkin
i will start on monday with chilli oil too because it looks so good
and the quinoa and broccolino salad will soon be my lunch in the office
we started with salad on long wednesday and i’m sure everybody will join
thank you for your inspiration
lg birgit
ps and no longer bad conscience about wasting food yeah
Lovely to hear from you Birgit!
Baked fruit it really delicious… just like veg the oven helps caramelise and instnsify the natural sweetness so you don’t need to add any processed sugar. So good!
That’s a great idea that your office is having salad wednesday.. love it!
And super glad to hear you’re looking forward to less waste!
Jx
I’m on vacation this week, but next week Sunday I will at I least make the chili oil. I already do pressure cook a whole bag of beans at a time and freeze them in one and a half cup portions to use as needed. I have never used lentils except for soup, but will try them in a recipe.
Lucky you being on vacation Joan!
I’ve been thinking about getting a pressure cooker for making beans.
Have a lovely week!
Jx